Monday, August 29, 2011

sun kissed tutorial

Hey Girls,

Today Ive decided to take a break from my back to basic's series to do a "sun kissed" look.

So lets get started :)

What I used:


  • Coastal Scents Concealer palette
  • NYX eye shadow base
  • L'oreal True Match foundation in c2 and w3
  • maybelline dream matte powder in golden sand
  • sleek contour kit in light 884
  • NYX trio i used taupe as my midtone and I used brown to fill in my brows
  • NYX trio I used black to define my eyes
  • Natural collection Lip Liner in Almond
  • Brow highlighter from soap and glory
  • NYC seperating mascara
  • NYX orange soda lipstick
  • Sleek lipgloss with vitamin e in a touch of pink (dupe for NARS turkish delight)


face brushes: 
Avon foundation brush
concealer brush
Avon powder brush
peggy sage fluffy brush for bronzer
Dunnes fluffy brush for highligher


eye brushes:
flat shadow brush
mac 224 (fluffy brush)
mac angled brush 266


  1. after preping the skin....conceal check out my post on how to use and apply concealer click here (sorry about my hair it was very early haha)


 2. for blemishes: apply concealer onto the area and press your finger on it for a few seconds this will help the concealer stick to the blemish

3. for my foundation i mixed c2 and w3 on the back of my hand and applied it with a foundation brush starting at the center of the face and working outwards
for foundation tips: click here


4. powder the face using a fluffy brush I wanted a dewy look so I applied very little powder
For tips on face powder: click here

                                               
                                 5. I took a brown shadow and filled in my brows with a angled brush
Remember to apply shadow in the direction of hair growth


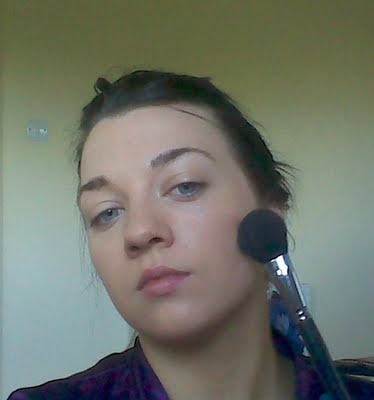
                               6. Then I took my contour kit and using the contour colour
                                                                 and a fluffy brush

I rolled my brush into the contour

taped of the excess powder
                      and holding the brush at the end of the handle ( for a lighter application)


                       I applied the contour under my cheekbones the brush should barely touch the skin
I also brought the powder up to my temples and forehead for that sun kissed glow


                                                            7. curled my lashes

                             8. And applied a black shadow to the base of my lashes to define my eyes
                         9. Taking a fluffy brush and my midtone colour i sweeped it across my crease

10. Then I took my highlight colour and applied it to my cheekbones, the center of my forehead, down the bridge of my nose and my chin


                                          11. I also used my highlight colour on my lids and applied 3 coats of mascara


                                                12. lined my lips with a lip liner pencil

                                                        13. And applied my lipstick and lipgloss

 14. Then I went back to my highlighter and applied it with a shadow brush to my cupids bow to give the illusion of fuller lips

15. and for my last step I took my brow highlighter


and applied it onto my brow bone

and blended it out and

Ta-da im all done :)
 I love this look it looks so fresh and dewy! 


Here's the finished look :)


Hope this was helpful
love
saz xxx


Back to Basic's part 5: Highlighting and Contouring

Hello my lovely viewers :)

Today Im doing part 4 of my Back to Basic's series and its all about highlighting and contouring.
for part 1: concealer Click here
part 2: foundation Click here
part 3: powder Click here
part 4: blush/ bronzer Click here

Why do we highlight and contour?
The objective is to create the illusion of having a oval shape face.


What do you use to highlight and contour?
To contour you will need a dark matte powder or cream you can also use a matte bronzer to shade the area
and to highlight you need a light colour cream or powder or a shimmer to catch the light and bring the area forward.
You can buy contouring sets like this one from sleek.


To know which area's you need to highlight and contour you need to find your face shape.
The oval shape face (egg shape) is the perfect face shape. You do not need to highlight or contour.


Round face: shorter and wide with full cheeks and round chin
Highlight: forehead, underneath the eyes and top of cheek bones
Contour: temples, cheeks and jaw line to create the illusion of a oval


Square face: same width at forehead,cheeks and jaw.
Highlight: center of forehead, underneath eyes and chin and apply blush on apples of cheeks.
Contour: hairline at 2 corners and jaw line at 2 corners


Heart shape face: wide at forehead and narrow chin
Highlight: chin, forehead and underneath eyes
Contour: temples and cheeks


Pear shaped: narrow at temples and wider at cheeks and jaw line
Highlight: forehead, underneath eyes and chin
Contour: jaw line and cheeks


Long face: high cheek bones and forehead and strong jaw line
don’t highlight or contour just simply brush a bit of bronzer across chin to shorten length and apply blush on apples of cheeks and work outwards this will widen your face.


To slim your nose:
Take a fluffy eye shadow brush and dip it into your contour colour and run the brush down the sides of your nose making sure you blend well then take your highlight shade and highlight the center of your nose.

Keep a eye out for part 6 :)
Don't forget to check out sinead's videos for more basic tips :)


Hope this was helpful
love
saz xxx

Sunday, August 28, 2011

Back to Basic's part 4: blush and bronzer

Hey girls,

So as promised here's part 4 of my back to basic's series :)

Part 1: concealer Click Here
Part 2: foundation Click Here
Part 3: powder Click Here


Why do we use Blush?
Blush is used to brighten and add life to your face.


What shade would suit my skin tone?


ivory/beige skin: a soft pink works best
mature skin: a peach blush will look more natural and fresher
olive skin: a blush with warm undertones works best such as cinnamon or copper
Ebony skin: use a blush with warm undertones like apricot


How many types of blush are out there?

Blush comes in 4 different textures:

Powder -works with all skin types, best for oily skin, most popular


Cream - fresh dewy finish and natural glow best for dry skin, and worst for oily skin, apply before powder, don’t need to wear foundation


                                         Natural Collection cream blush in Rosy Pink


Gel - sheer glow, long lasting, looks natural, apply before powder, can use it with or without foundation.
Unfortunately I don't own a gel blush so i have no swatches :( but i know this gel blush from Smashbox is meant to be fantastic! I will be buy it soon and ill put swatches up then.


Liquid- liquid that stains the skin, needs to be blended quickly, waterproof, will last all day


                                                            Opia liquid blush from primark


How do I apply blush: 
Smile and apply blush to the apples of your cheeks blending out towards your ear


TIP: For a long lasting blush apply... a cream blush on the apples of cheeks blending towards your ear after you have applied your foundation then powder your face and apply your powder blush.
You can also us lipstick as a cream blush.


Why do we use Bronzer?
Bronzer is used to give a warm healthy glow to the skin


Is there different types of bronzer?
Powder- most popular, easy to control and blend, comes in pressed, loose, balls/beads


Cream- great on dry skin or if you don’t want to wear foundation


You can also us a liquid foundation 1 or 2 shades darker than your foundation as a bronzer

Tip: I would recommend using a matte bronzer, sometimes bronzer's with a shimmer can look unnatural and make any textural flaws look more obvious!!!!


How to apply bronzer:
Dust bronzing powder along outer edges of your face and cheekbones with a fluffy brush, start at the back of cheekbone and sweep it forward and up to the temples


If your using a cream dot the colour along cheek bone and blend

You can also apply bronzer all over your face to give you a natural tan rather than using a foundation that is to dark for you.

 Back to Basic's part 5: Highlighting and contouring will be up tomorrow


Don't forget to check out my friends You Tube videos for more basic tips :)


        Hope this was helpful! :)
love always
                                                                      saz xxx P.S dont forget to like my facebook page :) click here